

How to replace a fuel filter step-by-step

Replacing a fuel filter is a crucial maintenance task that every vehicle owner should undertake to ensure optimal engine performance. A clean fuel filter prevents dirt and debris from entering your engine, allowing for smooth fuel flow and better combustion. Neglecting this important component can lead to reduced fuel efficiency, engine misfires, and, ultimately, costly repairs.
This guide will take you through the step-by-step process of replacing your vehicle’s fuel filter, making it a manageable DIY project. Whether you drive a sedan, SUV, or truck, understanding how to change your fuel filter can save you time and money while enhancing your vehicle’s reliability.
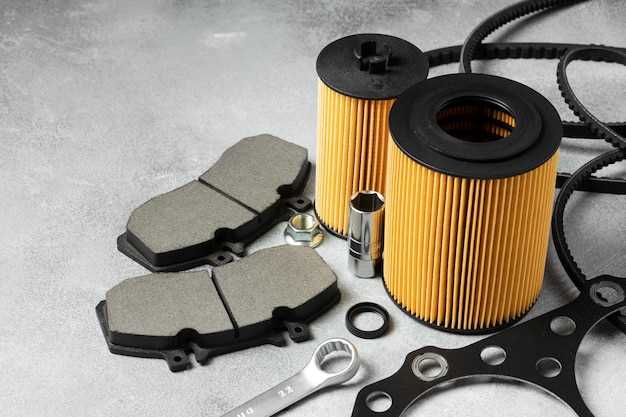
Before diving into the replacement procedure, it’s essential to gather the necessary tools and safety equipment to ensure a smooth and safe experience. Having the right resources at your disposal will not only speed up the process but also minimize the risk of any accidental spills or mishaps. Let’s get started!
Choosing the Right Fuel Filter for Your Vehicle
Selecting the correct fuel filter is crucial for ensuring optimal engine performance and longevity. Fuel filters are designed to trap contaminants and debris before they enter the fuel system, preventing damage to the engine. To begin the replacement process, you should refer to your vehicle’s owner’s manual, which typically provides specifications for the appropriate fuel filter model.
When choosing a fuel filter, consider the make, model, and year of your vehicle. Each vehicle has unique requirements based on its fuel system configuration. Additionally, you can examine the specifications on your existing fuel filter for compatibility, such as size, fittings, and filtration efficiency.
It is also advisable to look for a fuel filter from a reputable manufacturer. Quality filters are designed to meet or exceed OEM specifications, ensuring reliable replacement and performance. Avoid purchasing generic or low-cost filters, as they may not provide adequate filtration or could fail prematurely.
Another factor to consider is the type of fuel your vehicle uses, whether it’s gasoline or diesel. Different fuel types require specific filters to handle the varying characteristics, such as viscosity and sediment build-up. Ensure that the selected filter is specifically designed for your fuel type to maintain the fuel system’s integrity.
Finally, assess the recommended replacement intervals for your chosen fuel filter. Some filters may require more frequent replacement than others, depending on your driving conditions and the quality of fuel used. Regular maintenance checks and timely replacements can prevent fuel system issues and enhance your vehicle’s efficiency.
Tools and Safety Precautions Before Starting the Replacement
Before beginning the fuel filter replacement, it’s essential to gather the necessary tools to ensure a smooth and efficient process. You will typically need a wrench or socket set, pliers, a fuel line disconnect tool, and a clean container to catch any spilled fuel. Additionally, having a shop vacuum and rags readily available can help manage any mess that occurs during the replacement.
Safety precautions are paramount when working with fuel systems. Start by ensuring your workspace is well-ventilated to avoid inhaling any harmful fumes. Always wear safety glasses and gloves to protect your eyes and skin from fuel exposure. It’s advisable to use a fire extinguisher nearby, as fuel is highly flammable. Make sure the engine is cool before starting, and disconnect the negative battery cable to prevent any sparks.
Before cutting any fuel lines, relieve the fuel pressure in the system. This can usually be done by removing the fuel pump relay and starting the engine until it stalls. Ensure that you have a fire-safe container ready to catch any fuel that might leak during the filter replacement. Having all tools organized and safety measures in place will facilitate a successful and safe fuel filter replacement.
Step-by-Step Process for Removing and Installing the Fuel Filter
To begin the fuel filter replacement, gather the necessary tools: a wrench set, a fuel line disconnect tool, and a container to catch any spilled fuel. Ensure that you are wearing safety gloves and goggles to protect yourself from fuel exposure.
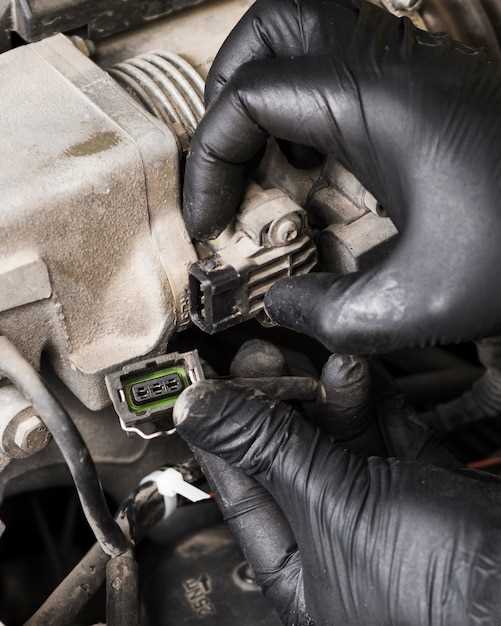
First, locate the fuel filter. It is usually positioned along the fuel line between the fuel pump and the engine. Refer to your vehicle’s service manual for specific details about your model.
Before removing the fuel filter, relieve the fuel system pressure. This can typically be done by removing the fuel pump fuse and starting the engine until it stalls. Turn off the ignition and disconnect the battery to ensure safety.
Next, position the container under the filter to catch any residual fuel that may leak out during the removal process. Using the wrench, loosen the bolts holding the fuel filter in place. Be cautious, as fuel may still be present around the filter.
After the filter is loosened, use the fuel line disconnect tool to detach the fuel lines connected to the filter. It is important to handle the lines carefully to avoid damage. Allow any remaining fuel to drain into the container.
With the old fuel filter removed, take the new filter and check that it is oriented correctly according to the flow direction indicated on the filter. Attach the fuel lines to the new filter, ensuring they are securely connected.
Reinstall the fuel filter by securing it with the previously loosened bolts. Double-check that all connections are tight and free of leaks. Reconnect the battery and reinstall the fuel pump fuse.
Finally, turn on the ignition to prime the fuel system and check for leaks around the new filter. If everything is secure, start the engine and let it run for a few minutes to ensure proper operation. Your fuel filter replacement is now complete.