

Brake system flushing – when and why to do it

The brake system is one of the most critical safety components of a vehicle, ensuring that drivers can stop promptly and effectively. Over time, brake fluid can become contaminated with moisture, dirt, and other impurities, leading to a decrease in performance and a potential risk to safety. This is where brake system flushing comes into play, a vital maintenance procedure that helps maintain optimal braking performance.
Flushing the brake system involves removing old, contaminated brake fluid and replacing it with fresh fluid. This process not only enhances braking efficiency but also extends the lifespan of brake components. Contaminated brake fluid can compromise the integrity of seals and cause corrosion in brake calipers and lines, which is why regular flushing is essential to ensure the system functions correctly.
Understanding the importance of brake system flushing and knowing when to perform this maintenance can greatly influence vehicle safety. Factors such as driving conditions, brake fluid type, and manufacturer recommendations all play a role in determining the ideal timing for a flush. In the following sections, we will delve into the benefits of flushing your brake system and provide a comprehensive guide to help you determine the right timing for this crucial task.
Understanding the Risks of Neglecting Brake Fluid Flush
Neglecting to flush brake fluid can pose significant risks to both vehicle performance and safety. Brake fluid plays a critical role in the hydraulic brake system, transferring force from the brake pedal to the brake components. Over time, brake fluid can become contaminated with moisture, dirt, and other particles, leading to reduced efficiency and compromised braking capabilities.
When moisture enters the brake fluid, it can lower the boiling point, resulting in brake fade during heavy use. This condition can cause a serious loss of braking power, especially in emergency situations when reliable stopping force is crucial. Additionally, contaminated fluid can lead to corrosion of brake system components, further exacerbating performance issues and increasing repair costs.
By neglecting regular brake fluid flushes, drivers are putting themselves and others at risk. The hydraulic system may fail to engage effectively, leading to potentially dangerous situations on the road. Proper maintenance, including timely fluid flushes, is essential for ensuring optimal brake function and enhancing overall safety.
To mitigate these risks, vehicle owners should adhere to the recommended maintenance schedule for brake fluid flushes, as outlined in the owner’s manual or by a professional mechanic. Regular flushing not only maintains the integrity of the braking system but also provides peace of mind knowing that the vehicle can stop safely when needed.
How to Identify When a Brake Flush is Necessary
Identifying the need for a brake flush is crucial for maintaining vehicle safety. Over time, brake fluid can absorb moisture and contaminants, which may lead to decreased braking performance. Here are key indicators that a brake flush is necessary:
1. Brake Fluid Color: Inspect the color of your brake fluid. Fresh brake fluid is typically a clear, light yellow color. If it appears dark or murky, it may indicate contamination, and a flush is recommended.
2. Performance Issues: If you notice a spongy or soft brake pedal, or if the brakes feel less responsive, it could be a sign that the fluid needs to be replaced. A brake flush may improve responsiveness and overall safety.
3. Regular Maintenance Schedule: Following the manufacturer’s maintenance recommendations is vital. Many manufacturers suggest flushing the brake system every two years or 20,000 to 30,000 miles, depending on driving conditions. Adhering to this schedule helps prevent brake system failures.
4. Warning Lights: If your vehicle’s dashboard shows a brake warning light, it could indicate low brake fluid levels or issues with the brake system. In such cases, a brake flush should be performed to ensure safety on the road.
5. Unusual Noises: Listen for strange noises when applying the brakes. Squeaking or grinding sounds may suggest that the brake components are wearing down, and flushing the brake fluid can help protect against further damage.
Regularly monitoring these signs can help you determine when a brake flush is necessary, ensuring the safety and reliability of your vehicle’s braking system.
Step-by-Step Guide to Performing a Brake System Flush Safely
Performing a brake system flush is crucial for maintaining the efficiency and safety of your vehicle’s braking system. Follow this step-by-step guide to ensure a safe and effective flush.
1. Gather Your Tools and Materials: Before you begin, collect all necessary tools including a brake fluid bleeder kit, a wrench, a container for old fluid, and fresh brake fluid that meets your vehicle’s specifications. Wear safety goggles and gloves to protect yourself.
2. Prepare the Vehicle: Park the vehicle on a level surface and engage the parking brake. If possible, lift the vehicle using jack stands for easier access to the brake components.
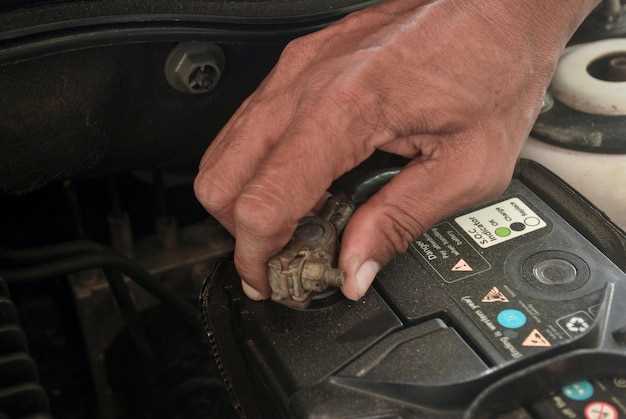
3. Locate the Brake Fluid Reservoir: Open the hood and find the brake fluid reservoir. Remove the cap and visually inspect the fluid for contamination. If it appears dark or dirty, it’s time to flush the system.
4. Start at the Farthest Wheel: Begin your flush at the wheel farthest from the brake master cylinder. This is usually the passenger side rear. Remove the wheel if needed to access the brake caliper or brake cylinder.
5. Bleed the Brake Lines: Use a wrench to loosen the bleeder valve on the brake caliper. Have an assistant pump the brake pedal several times and hold it down. Open the bleeder valve to allow old fluid and air to escape into your container. Close the valve before your assistant releases the pedal. Repeat this process until you see clear fluid coming out.
6. Monitor Fluid Levels: Continuously check the brake fluid reservoir, and refill it with fresh fluid as needed to prevent air from entering the system. Ensure you are using the appropriate brake fluid type recommended for your vehicle.
7. Repeat for All Wheels: Move to the next wheel in the following order–driver’s side rear, passenger side front, and finally driver’s side front. This ensures that all lines are flushed properly.
8. Final Check and Test: After flushing all brake lines, recheck the brake fluid reservoir level and make sure it is filled to the recommended level. Replace the reservoir cap securely. Test the brakes by pressing the pedal a few times until it feels firm before driving the vehicle.
9. Dispose of Old Brake Fluid Safely: Dispose of the used brake fluid according to local regulations. Never pour it down the drain or throw it in the trash, as it is hazardous waste.
By following this guide, you can perform a brake system flush safely, ensuring that your vehicle remains responsive and well-maintained for optimal safety on the road.