

Guide to replacing engine air filters at home

Maintaining your vehicle’s performance is crucial, and one of the simplest yet most effective tasks you can do is replace the engine air filter. The engine air filter plays a vital role in ensuring that clean air enters the engine, allowing for optimal combustion and efficiency. Over time, this filter can become clogged with dirt and debris, leading to a decrease in engine performance and fuel efficiency.
Replacing the air filter at home is a straightforward process that requires minimal tools and can save you both time and money. By understanding the importance of a clean air filter and following a few simple steps, you can ensure that your engine runs smoothly and efficiently. Regularly changing the engine air filter not only extends the life of your vehicle but also contributes to a healthier environment by reducing harmful emissions.
This guide will provide you with clear, step-by-step instructions on how to inspect, remove, and replace the engine air filter on your own. With a little patience and attention to detail, you can complete this task quickly and confidently, making vehicle maintenance a less daunting task.
Choosing the Right Air Filter for Your Vehicle
Selecting the appropriate air filter for your vehicle is crucial for ensuring optimal engine performance and longevity. The engine air filter prevents dust, dirt, and debris from entering the engine, which can otherwise lead to decreased efficiency and potential damage.
Firstly, consult your vehicle’s owner’s manual to identify the recommended specifications for the air filter. This information typically includes the correct size, shape, and filtration capacity. Each vehicle model may have unique requirements, so it is essential to adhere to these guidelines.
Next, consider the type of filter material. There are primarily two types: pleated paper filters and reusable cloth filters. Pleated paper filters are disposable and generally offer good filtration at an affordable price. On the other hand, reusable cloth filters, while more expensive, can be cleaned and reused multiple times, thus saving money in the long run. Choose based on your budget and preference for convenience.
Also, pay attention to filter ratings. Filters are often rated by their efficiency in capturing particles of various sizes, typically indicated by the MERV (Minimum Efficiency Reporting Value) rating. A higher MERV rating means better filtration capabilities, but it is important to ensure that the filter does not restrict airflow excessively, as this can negatively impact engine performance.
Lastly, consider purchasing air filters from reputable manufacturers. Brands that specialize in automotive parts often provide higher quality and reliability. Research customer reviews and compare different products to find the best option that meets both performance and cost criteria.
Step-by-Step Guide to Removing the Old Air Filter
Begin by ensuring your vehicle is parked on a flat surface and the engine is turned off. Allow the engine to cool down to avoid any burns or injuries during the process.
Open the hood of your vehicle and locate the air filter housing. This is typically found near the engine, and it may have clips or screws holding it in place. Consult your vehicle’s manual if you are unsure of its exact location.
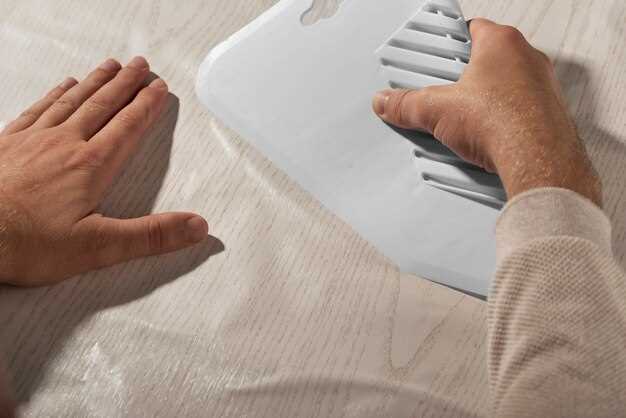
Once located, disengage any clips or remove screws that secure the air filter housing. Carefully lift off the housing cover to expose the old air filter inside.
Take note of how the old air filter is positioned within the housing. This will be important for installing the new filter correctly. Gently pull the old air filter out, being cautious not to let any dirt or debris fall into the intake area.
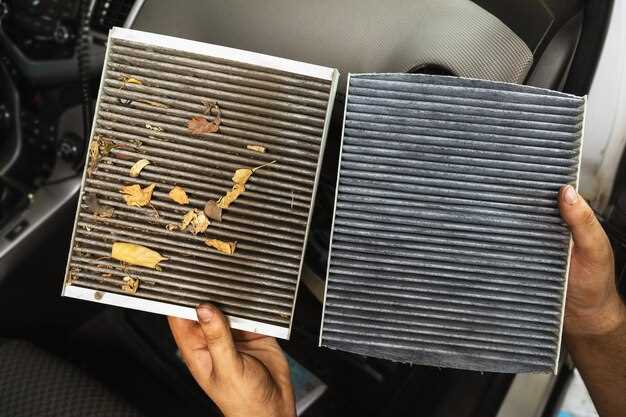
Inspect the old air filter for any signs of damage or excessive dirt. If it appears particularly dirty or damaged, this is a good indicator that replacing it was necessary.
Before proceeding, take a moment to clean the inside of the air filter housing with a damp cloth to remove any accumulated dust and debris. This ensures that the new air filter will function effectively from the moment it is installed.
With the old air filter fully removed and the housing cleaned, you are now ready to insert the new air filter. Ensure it fits snugly into place, following the orientation you noted earlier. Secure the housing cover back on with the previously removed clips or screws, making sure everything is tightly fastened.
Proper Installation of the New Air Filter
When installing a new air filter, ensuring a proper fit is crucial for optimal engine performance. Begin by aligning the filter with the housing; it should fit snugly without any gaps. If the filter is incorrectly positioned, it may allow unfiltered air to enter the engine, leading to potential damage.
Before insertion, check the filter for any defects or debris. A clean, undamaged filter is essential for effective air filtration. Make sure to handle the filter with care to avoid any contamination. If the filter comes with rubber gaskets or seals, confirm that they are intact and properly seated within the housing.
Insert the air filter into the designated compartment, ensuring that it is oriented correctly according to the manufacturer’s specifications. Most filters will have an airflow direction indicated, usually marked with an arrow. Pay attention to these markings, as improper orientation can hinder airflow and reduce efficiency.
Once the filter is in place, securely close the air filter housing. Listen for any clicks or snaps that indicate the cover is properly secured. Finally, take a moment to visually inspect the installation to ensure that everything is aligned correctly and that there are no visible gaps between the housing and the filter.
Maintaining a tightly sealed air filter system plays a vital role in ensuring that your engine receives clean air while minimizing the ingress of dirt and contaminants. Regular checks and timely replacements will keep your vehicle running smoothly.