

How to inspect radiator hoses for wear

The radiator system is a crucial component of any vehicle’s cooling system, playing a vital role in regulating engine temperature. Among its many parts, the radiator hoses are particularly susceptible to wear and tear over time. Regular inspection of these hoses is essential to ensure optimal performance and prevent potential overheating issues.
When examining radiator hoses, one of the most critical indicators of wear is the presence of cracks. These cracks can develop due to age, extreme temperatures, or exposure to harmful chemicals. Identifying these flaws early can save motorists from costly repairs and unexpected breakdowns.
During your inspection, it is important to look not only for visible cracks, but also for signs such as swelling, soft spots, or hardened areas. Each of these symptoms can signal that the hose is nearing the end of its lifespan and may need replacement. By staying proactive and monitoring the condition of your radiator hoses, you can maintain the efficiency of your vehicle’s cooling system and enhance its overall longevity.
Identifying Cracks and Weak Spots in Radiator Hoses
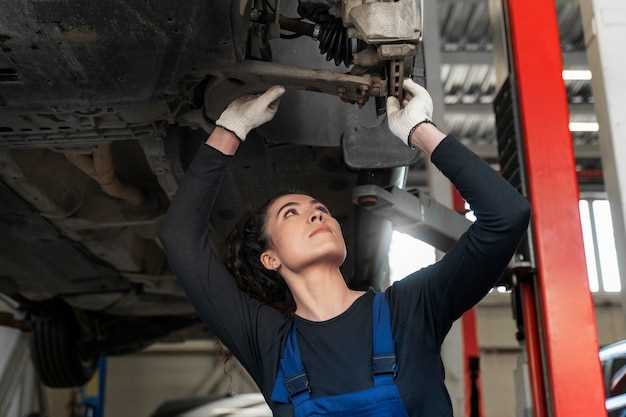
Radiator hoses play a crucial role in the engine cooling system, transferring coolant between the engine and the radiator. Over time, these hoses can develop cracks and weak spots, which can lead to leaks and overheating. Identifying these issues early can save you from costly repairs and engine damage.
When inspecting radiator hoses, begin by visually examining their surfaces. Look for any noticeable cracks, which may appear as small splits or deeper fissures. Pay attention to areas where the hose bends, as these spots are more susceptible to wear and may show signs of fatigue.
In addition to visual checks, you should also feel the hoses for any irregularities. Gently squeeze the hoses; they should feel firm yet flexible. If you detect any soft spots, bulges, or a sponge-like texture, these could indicate deterioration. Cracks can often be concealed by dirt or grime, so it’s essential to clean the hoses before inspection to ensure a thorough evaluation.
Furthermore, it’s important to check the hose connections for signs of leaks. If coolant is seeping from the junction between the hose and the radiator or any connections, it may signal that the hose is compromised. Regularly monitoring your radiator hoses for these issues will help maintain your vehicle’s cooling system and performance.
Understanding the Impact of Temperature and Pressure on Hose Integrity
Radiator hoses are essential components of a vehicle’s cooling system, designed to withstand varying temperatures and pressures. Over time, exposure to these conditions can significantly affect their integrity. High temperatures can cause rubber hoses to become brittle, leading to the formation of cracks. These cracks can develop due to thermal expansion and contraction, as the hoses repeatedly heat up and cool down during operation.
Moreover, pressure fluctuations within the cooling system also contribute to hose deterioration. When the engine is running, the coolant exerts pressure on the hoses. If a hose is already weakened by age or environmental factors, this pressure can exacerbate existing flaws, further increasing the likelihood of cracks. Regular inspection is critical, as even small fissures can lead to coolant leaks, potentially causing engine overheating and significant damage.
In conclusion, maintaining the integrity of radiator hoses requires an understanding of how temperature and pressure interact with the materials. Regular checks for signs of wear, especially cracks, are vital in ensuring the efficient functioning of the cooling system and preventing costly repairs.
Steps to Replace Damaged Radiator Hoses Safely

Replacing damaged radiator hoses is crucial for maintaining your vehicle’s cooling system. Follow these steps to ensure a safe and effective replacement process.
- Gather Necessary Tools and Materials:
- New radiator hoses
- Hose clamps
- Wrench set
- Screwdriver
- Coolant
- Catch pan
- Gloves and safety goggles
- Allow Engine to Cool:
Ensure the engine is completely cool before starting. This prevents burns from hot coolant or metal parts.
- Locate Radiator Hoses:
Identify the upper and lower radiator hoses connected to the radiator and engine block.
- Drain Coolant:
Place a catch pan under the radiator. Open the radiator drain valve and allow the coolant to drain. Dispose of it properly.
- Remove Old Hoses:
- Loosen hose clamps using the wrench or screwdriver.
- Gently twist and pull the hoses off the radiator and engine.
- Inspect the connection points for any residue or damage.
- Prepare New Hoses:
Compare the new radiator hoses with the old ones to ensure proper fit. Lubricate the ends with a small amount of coolant for easier installation.
- Install New Hoses:
- Slide the new hose over the radiator fitting and engine block.
- Ensure the hoses are seated properly, then tighten the hose clamps securely.
- Refill Coolant:
Close the drain valve and refill the radiator and coolant reservoir with the appropriate coolant. Follow the manufacturer’s guidelines for the coolant mixture.
- Check for Leaks:
Start the engine and let it run for a few minutes. Observe the new hoses for any signs of leaks or bulging.
- Dispose of Old Hoses:
Recycle or dispose of the damaged hoses according to local regulations.
Following these steps will help you safely replace damaged radiator hoses, ensuring your vehicle’s cooling system operates efficiently.