

How to test your car’s electrical system at home

Understanding your car’s electrical system is crucial for maintaining its overall functionality and performance. A variety of components, such as the battery, alternator, and various wiring connections, play pivotal roles in your vehicle’s electrical system. This guide focuses on how to effectively test these components at home using a multimeter, a fundamental tool for diagnosing electrical issues.
By learning to use a multimeter, you will gain the ability to measure voltage, current, and resistance within your car’s electrical system. This knowledge can help you identify potential problems before they escalate into more severe issues, saving you both time and money on repairs. Moreover, understanding these electrical principles will enhance your skills as a DIY mechanic.
In the following sections, we will outline step-by-step procedures for testing various electrical components in your vehicle. Whether you’re dealing with a battery that won’t hold a charge, flickering lights, or a malfunctioning starter, this guide will equip you with the necessary techniques to troubleshoot effectively. Get ready to dive into the world of automotive electrical testing!
Choosing the Right Multimeter for Automotive Testing
Selecting the appropriate multimeter for automotive testing is crucial for efficient and accurate diagnostics. When looking for a multimeter, consider the type of measurements you’ll frequently perform, such as voltage, current, and resistance. A digital multimeter (DMM) is generally recommended due to its ease of use and readability compared to analog models.
Look for a multimeter that offers a decent range of voltage measurements, typically from 0 to 20 volts for automotive applications, as most car electrical systems operate within this range. Additionally, ensure it can measure both DC and AC voltage, as this versatility can be beneficial for various applications.
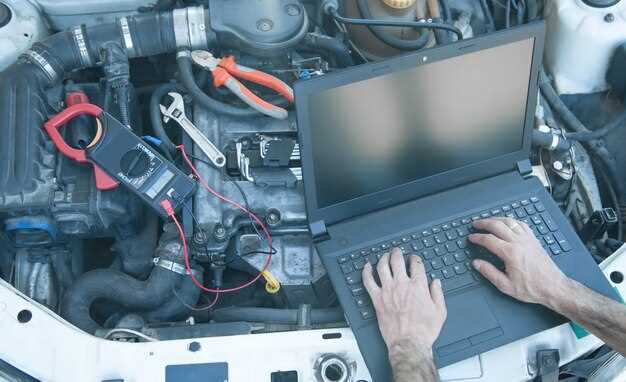
Current measurement is also essential. A multimeter that includes a clamp feature can simplify the process of measuring current without disconnecting wires. Furthermore, make sure the device can handle the appropriate current levels for your vehicle, often up to 10 amps, to prevent damage during testing.
Resistance testing is vital for checking fuses, continuity, and sensors. A multimeter that provides a clear continuity beep or visual alert can save time and increase efficiency during testing processes. Moreover, having a hold function can be handy for capturing readings in difficult-to-reach areas.
Finally, consider additional features like backlit displays for improved visibility in low-light conditions, and rugged design for durability in automotive environments. Investing in a quality multimeter will not only enhance your ability to test your car’s electrical system but will also save time and resources in the long run.
Step-by-Step Process for Diagnosing Common Electrical Issues
Diagnosing electrical issues in your vehicle can often be accomplished at home with a few tools, primarily a multimeter. This guide will take you through a systematic approach to identify and troubleshoot common problems.
Step 1: Gather Your Tools
Ensure you have a reliable multimeter, a set of basic hand tools, and safety gear such as gloves and safety glasses. Understanding how to properly use a multimeter is essential for accurate readings.
Step 2: Inspect the Battery
Begin by checking the car battery. Use the multimeter to measure the voltage; a healthy battery should read around 12.6 volts or more when not in use. If the voltage is significantly lower, try charging the battery or consider replacement.
Step 3: Check Battery Connections
Ensure that the battery terminals are clean and tightly connected. Corroded or loose connections can lead to poor electrical contact. If you notice corrosion, clean the terminals with a battery brush and re-secure the connections.
Step 4: Test the Fuses
Locate the fuse box and examine each fuse. Use the multimeter to test for continuity; a blown fuse will show no continuity. Replace any faulty fuses and recheck the systems that were impacted.
Step 5: Inspect Wiring and Connectors
Examine the wiring harnesses and connectors for signs of wear, damage, or loose connections. Pay particular attention to areas where wires may rub against metal surfaces. Repair or replace any damaged wiring as necessary.
Step 6: Measure Voltage at Key Points
Using the multimeter, measure voltage at various components such as the starter, alternator, and ignition system. Compare these readings with the specifications in your vehicle’s service manual. This will help isolate the issue to a specific component.
Step 7: Test Electrical Components
For components like lights and sensors, use the multimeter to check for proper operation. Measure the voltage at connectors while the component is in use. Non-functioning parts might require replacement or further inspection.
Step 8: Evaluate Ground Connections
Poor ground connections can lead to electrical issues. Use the multimeter to check continuity between the ground terminal and the battery negative terminal. Ensure that all ground points are secure and free from corrosion.
Step 9: Document Findings
Keep a record of your findings as you go through this process. This will help you track any patterns in electrical issues and assist in communicating with a professional mechanic if further diagnosis is needed.
Step 10: Seek Professional Help
If you have followed these steps and are still unable to resolve the issue, it may be time to consult a professional technician. They will have access to advanced diagnostic tools and expertise to further investigate complex electrical issues.
Interpreting Multimeter Readings for Accurate Troubleshooting
Using a multimeter to test your car’s electrical system can reveal many underlying issues. Understanding how to interpret the readings is crucial for accurate troubleshooting. A multimeter can measure voltage, current, and resistance, providing insights into whether components of your electrical system are functioning properly.
When measuring voltage, ensure the multimeter is set to the correct range. A reading close to the specified voltage for your battery or electrical component indicates that it is functioning correctly. For a 12-volt battery, a reading between 12.4 and 12.6 volts suggests the battery is healthy, while lower values may indicate a need for charging or replacement.
Current measurement requires the multimeter to be placed in series with the circuit. This can be a bit more complex, as improper connections can lead to inaccurate readings. A normal current reading in a circuit should align with the specifications of the component being tested. If the reading is significantly higher or lower than expected, there may be a short circuit or failing component.
Resistance testing helps determine the continuity of wires, fuses, and components. With the multimeter set to the ohms scale, a reading close to zero indicates good conductivity, while a high or infinite reading suggests a broken connection. Always ensure the circuit is powered off before measuring resistance to avoid damaging the multimeter.
In conclusion, accurately interpreting multimeter readings involves understanding the context of each test and what the values indicate for your car’s electrical system. By becoming familiar with voltage, current, and resistance measurements, you can perform effective troubleshooting and maintain your vehicle’s electrical health.