

How to test your fuel system for pressure loss

The diagnostics of a fuel system is crucial for ensuring optimal engine performance and efficiency. A common issue that affects the functionality of modern engines is pressure loss within the fuel system. Diagnosing and addressing this problem systematically can prevent costly repairs and enhance overall vehicle reliability.
In this article, we will guide you through a step-by-step process to test for pressure loss in the fuel system. Understanding the principles of pressure dynamics in fuel lines and components will assist you in pinpointing the exact source of the issue. By using the right tools and following precise methodologies, you can effectively identify leaks or weak points that may compromise fuel delivery.
As we delve deeper into the testing process, we will cover essential techniques and safety precautions that should be taken into account. Whether you are a seasoned mechanic or a DIY enthusiast, this comprehensive guide will empower you with the knowledge required for effective diagnostics of your vehicle’s fuel system.
Identifying Symptoms of Fuel Pressure Loss in Vehicles
One of the primary indicators of fuel pressure loss in vehicles is hard starting or the inability to start the engine altogether. When the fuel system is unable to maintain adequate pressure, there may not be enough fuel delivered to the engine for it to ignite properly. This symptom often manifests as prolonged cranking time before the engine starts.
Another common symptom is engine misfiring or hesitation during acceleration. Insufficient fuel pressure can lead to an inadequate fuel flow in the combustion chamber, causing the engine to stumble or lose power when the driver tries to accelerate. This is particularly noticeable during demanding driving conditions such as going uphill or merging onto highways.
A decrease in fuel efficiency is also a sign of potential pressure loss. If the fuel system is not delivering the appropriate amount of fuel, the engine may compensate by running overly rich or lean, both of which can negatively impact gas mileage. Keeping track of changes in fuel consumption can help in identifying problems early on.
Drivers may also notice a rough idle or fluctuations in engine RPM. When fuel pressure is inconsistent, it can cause the engine to run unevenly while idling. This instability can be felt through the steering wheel or seat, indicating that the engine is not receiving the proper amount of fuel consistently.
Lastly, the presence of fuel leaks or physical signs of fuel pressure issues, such as a damaged fuel line or malfunctioning pressure regulator, should not be overlooked. If evidence of fuel leakage is detected, it is crucial to assess and test the pressure in the fuel system to prevent further complications and ensure safety while operating the vehicle.
Tools and Equipment Needed for Fuel Pressure Testing

To effectively test fuel system pressure and diagnose potential issues, several essential tools and equipment are required. Each item serves a specific purpose, ensuring accurate readings and reliable diagnostics of the fuel system.
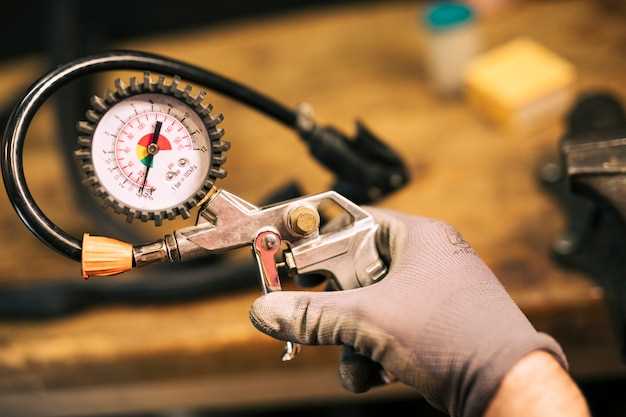
First and foremost, a fuel pressure gauge is indispensable for measuring the actual pressure within the fuel system. This tool typically features a dial or digital readout and connects directly to the fuel rail or test port. Select a gauge that provides a comprehensive range of pressure measurements suitable for the vehicle being tested.
Additionally, a fuel line adapter may be necessary to facilitate the connection between the fuel pressure gauge and the vehicle’s fuel system. These adapters come in various sizes and configurations to fit different fuel systems properly.
A set of basic hand tools, such as wrenches and screwdrivers, is crucial for removing any components obstructing access to the fuel system, including the fuel pump or fuel rail. Ensure that you have the correct sizes and types to avoid damaging fixtures during disassembly.
Safety equipment is vital during this testing process. Use safety glasses to protect your eyes from fuel splashes and gloves to keep your hands safe from exposure to fuel and related chemicals. A fire extinguisher should be readily accessible in the workspace, as fuel systems can be hazardous.
A multimeter is also beneficial for diagnosing electrical issues in the fuel system, such as checking voltage or continuity at the fuel pump and related sensors. Proper electrical diagnostics can help pinpoint problems that may lead to pressure loss.
Finally, a detailed repair manual or guide specific to the vehicle is invaluable. This resource provides necessary specifications, procedures, and troubleshooting steps tailored to the particular make and model, enhancing the accuracy of diagnostics and repairs related to fuel pressure testing.
Step-by-Step Procedure for Conducting a Fuel Pressure Test
To ensure proper functioning of the fuel system, performing a fuel pressure test is essential. Follow these steps to conduct a thorough test.
Step 1: Gather Necessary Tools
Collect the required tools for the test, including a fuel pressure gauge, appropriate adapters, safety goggles, gloves, and rags to manage spills.
Step 2: Locate the Fuel Pressure Test Port
Identify the fuel pressure test port on the fuel rail. This is typically a Schrader valve that is easy to access for testing purposes.
Step 3: Prepare the Vehicle
Start the vehicle and allow it to reach normal operating temperature. This ensures that the fuel system is under regular working conditions.
Step 4: Disconnect the Fuel Pump Relay
Turn off the engine and disconnect the fuel pump relay to relieve fuel pressure before attaching the gauge. This step is crucial for safety and accuracy.
Step 5: Attach the Fuel Pressure Gauge
Carefully connect the fuel pressure gauge to the test port. Make sure the connection is secure to prevent leaks during testing.
Step 6: Reconnect the Fuel Pump Relay
Reconnect the fuel pump relay and turn the ignition key to the “ON” position without starting the engine. This action allows the fuel pump to pressurize the system, enabling you to take a reading.
Step 7: Note the Pressure Reading
Observe and record the pressure reading on the gauge. Compare this value to the manufacturer’s specifications to determine if the pressure is within the acceptable range.
Step 8: Perform Additional Tests
If the pressure is low, conduct further diagnostics on the fuel pump, fuel filter, and regulator to identify potential issues causing the pressure loss.
Step 9: Disconnect the Gauge
Turn off the ignition and safely disconnect the fuel pressure gauge from the test port. Ensure that no fuel spills occur during this process.
Step 10: Reassemble the Components
Reinstall any components that were removed during the test, including the fuel pump relay. Make sure everything is secured properly to avoid future issues.
Following this step-by-step procedure will help achieve accurate diagnostics of the fuel system’s performance and identify any pressure loss effectively.